

How To Set Priority Internet Connection
Change Network Connexion Priority in Windows x
Generally, nosotros have no reason to change network connection priority, because Windows figurer has chosen the right network connection. Only if you desire to select the preferred one network and desire to automatically connect to it, or you simply want to make the connectedness sequence different, this article could assistance you.
Firstly, allow's see the current network carte du jour priority or network connection priority. So movement the network you like to the preferred identify in Network Advanced Settings or prioritize the wireless network with command.
Office i: bank check network card priority with control in Windows 10
one. Press Win + X keys and select Control Prompt (Admin) in carte du jour.
2. Enter control "netstat –rn | more" and printing Enter push.
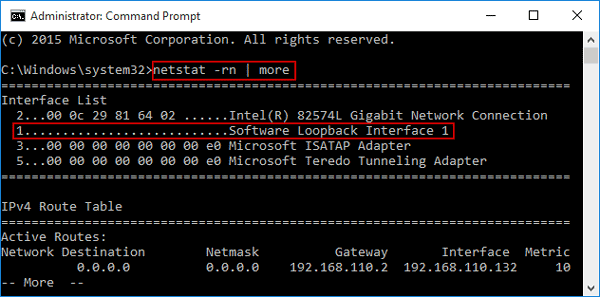
In the following results, y'all can run into the Interface List in CMD window. Under Interface Listing, the number in the left side means that gild of network card. So we can see now the first connection network is "Software Loopback Interface", followed by "Gigabit Network Connectedness".
Office 2: Change wired/wireless network connection priority
2 ways for wired network connection:
Way 1: Change Network connections avant-garde settings
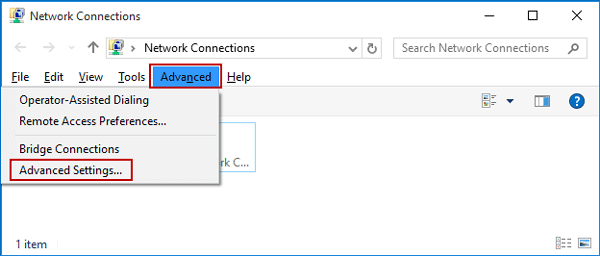
1. Press Windows primal + X and select Network Connections from the carte.
ii. Press the Alt cardinal in keyboard and click Avant-garde Advanced Settings.
three. Select the network connexion and click the arrows in the correct side to change the network connection priority.
![]()
4. Click OK at terminal when y'all retrieve you lot take organized the priority of the network connection.
And so the computer volition follow the order to connect to network. Too the unproblematic and directly way, you could also modify network priority through Cyberspace Protocol.
Fashion 2: Change Internet Protocol settings
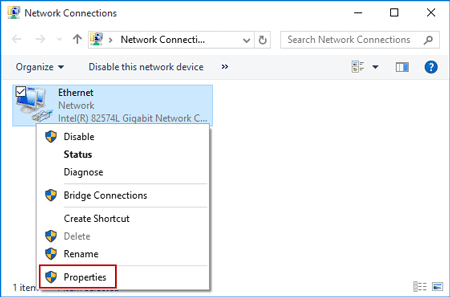
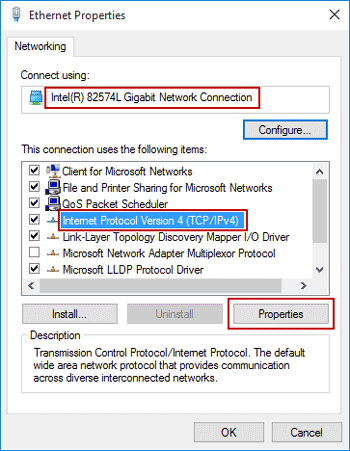
1. Open up Network Connections and right click the network you want to change its priority.
2. Select Backdrop and click ""nternet Protocol Version 4 (TCP/IPv4)" in network Properties. Click "Properties" again.
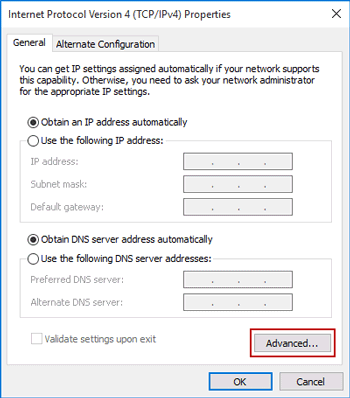
3. In the Protocol Properties dialog, click Advanced push button.
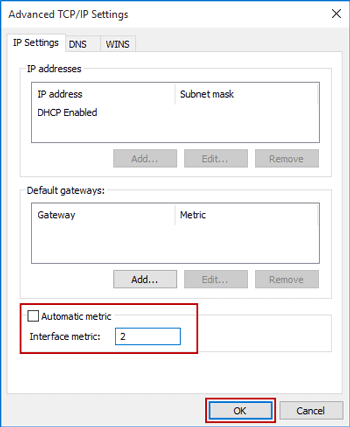
4. In Advanced TCP/IP Settings dialog, uncheck the option Automatic metric and enter the connectedness sequence for the network. Click OK to save priority changes.
2 means for wireless network connectedness:
Way 1: Modify the automatic connected network
- 1. Click the wireless icon in the notification surface area.
- 2. Connect to a network and cull connect automatically, to motion the network up in the priority listing.
Way ii: Control prompt
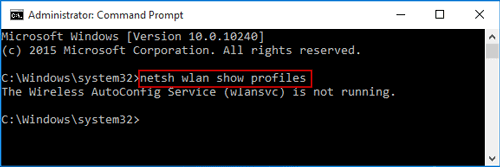
1. Run Command Prompt (Admin).
two. Display all the connections that linked to your reckoner.
netsh wlan show profiles
Annotation: If there is no wireless network, the control would prompt yous that "The Wireless AutoConfig Service is non running".
three. Chang the order of precedence with command below.
netsh wlan gear up profileorder name="Guest1″ interface="Wi-Fi" priority=1
Note: Guest1 is the name of the active network which y'all want to prioritize. You substitute this proper noun with the 1 whose precedence is to be changed.
Related Articles:
- How to Change Network from Public to Private in Windows x
- Turn on or off Network Discovery in Windows 10
- Add Network/Documents/This PC to Taskbar in Windows 10
- Set up or Alter CPU Priority to Prefer Foreground Apps in Windows 10
- How to Connect to WiFi or WLAN on iPhone/iPad
- Locked out of Windows ten and No Internet to Reset Password

How To Set Priority Internet Connection,
Source: https://www.isunshare.com/windows-10/change-network-connection-priority-in-windows-10.html
Posted by: tackhicall1994.blogspot.com
0 Response to "How To Set Priority Internet Connection"
Post a Comment